Blog
Build & Test a Model Context Protocol (MCP) Server with TypeScript and MCP Inspector
June 13, 2025 - Roy Derks
Building MCP servers can be stressful and time-consuming. This is why you should use a combination of both LLMs and the MCP Inspector to assist you while building your MCP server. The MCP Inspector is a tool that can help you with this process by letting you test MCP servers in a similar way as you would test APIs. LLMs, on the other hand, can provide you with suggestions and guidance as you build your server, and help you debug issues that may arise during the build process.
We'll walk through the full process of building an MCP server for Open Library, a free and open-source book catalog API. You'll learn how to:
- Build a TypeScript-based MCP server
- Use the MCP Inspector to validate server responses
- Leverage LLMs for suggestions and debugging
- Integrate Open Library’s public API into your MCP setup
Click the image below to watch the YouTube video version:
 VIDEO: Build & Test a MCP Server with TypeScript and MCP Inspector
Introduction
Learn more about the Model Context Protocol (MCP)
In this tutorial, we'll be building an MCP server for Open Library, an open, editable library catalog with a public API. Using the API, you can search and browse through a vast collection of books, authors, publishers, and more. Open Library is a project from the Internet Archive and can be thought of as the "Wikipedia for books". Furthermore, we'll use MCP Inspector and Claude Desktop to test the MCP server while building it.
Building a MCP server
As we'll be using the Node.js SDK for the MCP server, we'll need to install it first. You can do this by running the following commands in your terminal:
npm init -y
npm i @modelcontextprotocol/sdk zod
npm i --save-dev typescript
This will set up a new Node.js project with a package.json file. We'll also need to install the Zod library, which is used for defining and validating types in TypeScript -- which is the other dependency we just installed.
In the package.json file, we'll need to add a "type": "module" property. This tells Node.js that our project is using ES modules instead of CommonJS. Also, we'll add a few scripts to run the project:
{
  "name": "mcp-open-library",
  "version": "0.1.0",
  "description": "A Model Context Protocol server for Open Library",
  "private": true,
  "type": "module",
  "bin": {
    "mcp-open-library": "./build/index.js"
  },
  "files": ["build"],
  "scripts": {
    "build": "tsc && node -e \"require('fs').chmodSync('build/index.js', '755')\"",
    "prepare": "npm run build",
    "watch": "tsc --watch",
    "inspector": "npx @modelcontextprotocol/inspector build/index.js"
  }
  //...
}
As you can see in the above code snippet, I've named the project mcp-open-library and set its version to 1.0.0. Also, we have scripts to build the code (both build and watch) and to run the project using the inspector script.
In a new file called src/index.ts you should add the following code:
import { McpServer } from "@modelcontextprotocol/sdk/server/mcp.js";
import { StdioServerTransport } from "@modelcontextprotocol/sdk/server/stdio.js";
import { z } from "zod";

const server = new McpServer({ name: "mcp-open-library", version: "1.0.0" });

server.tool(
  "search_books",
  `
  Search for books on the Open Library API.
  `,
  {
    q: z.string(),
  },
  async ({ q }) => {
    const data = await fetch(
      `https://openlibrary.org/search.json?q=${q}&limit=20`
    );
    const json = await data.json();

    return {
      content: [
        {
          type: "text",
          text: JSON.stringify(json),
        },
      ],
    };
  }
);

await server.connect(new StdioServerTransport());
This code is a bit more complex than the previous example, but it's still pretty straightforward. We're creating an instance of the McpServer class and setting its name to "mcp-open-library" and version to "1.0.0". Then we add a tool called "search_books" that takes a query string as input and returns a list of books from the Open Library Search API. Later on in this tutorial we'll add more information about how to use this tool later on, but the value of q can be either a search term (like rowling for finding results about J.K. Rowling) or a search term prefixed with a category like author or title.
We then connect to a server using the StdioServerTransport class, which allows us to run our server in an interactive shell. Finally, we export the server instance so that it can be used by other scripts.
Try out a MCP server in MCP Inspector
To try this MCP server, you need first need to build and compile the code by running the following command in your terminal:
npm run watch
(You could also run npm run build but it will only run once, means you'll have to run it again after every change in your code).
Once you've built and compiled your code, you can run the server by running the following command in ANOTHER terminal window or tab:
npm run inspector
This will start MCP Inspector running on a local server, and you can connect to it by opening the following URL in your browser http://127.0.0.1:6274.
Here, you would first need to connect to the MCP server:
- In the left menu select
stdiounder "Transport type" - Under "Command" type
node - Under "Arguments", type
build/index.js - Press "Connect" to connect to the MCP server
The MCP Inpector will automatically list all the tools available on the MCP server, and you can try them out by selecting one and pressing "Run tool".
For example, to use the Open Library tool, you would select it from the list of tools, provide a value for q (like author:rowling) and press "Run tool". This wil call the Open Library tool and display the results in the MCP inspector, as you can see in the screenshot below:
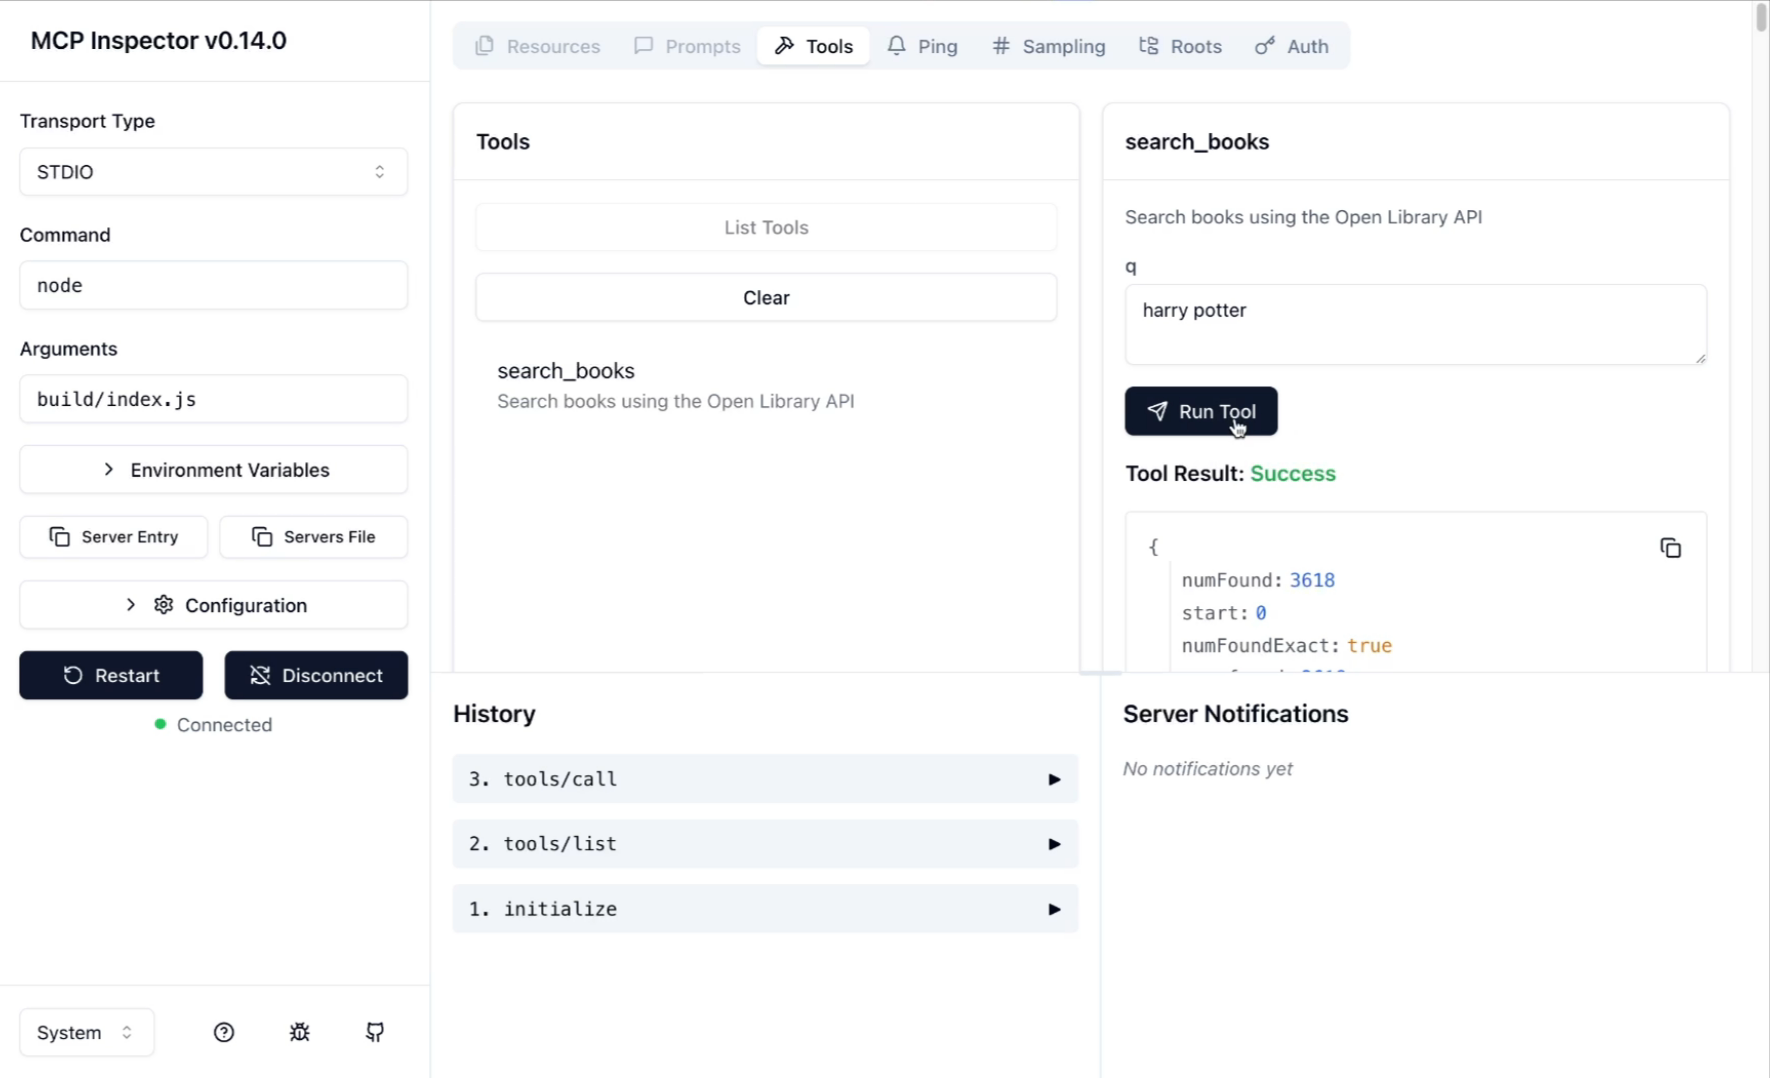 MCP Inspector via stdio overview
In the MCP inspector you can also find the history of all the tools you've run, and you can also find the response for each tool.
Iterating on the server
You can also iterate on the server by modifying the code. For example, we can limit the amount of data returned by the tool and handle pagination to see more than just 20 results.
First, let's add the page and limit arguments to the tool:
  {
    q: z.string(),
    limit: z.number().default(20),
    page: z.number().default(1),
  },
The values for limit and page are optional, so we can set a default value for both.
And then pass these arguments to the fetch call:
  async ({ q, limit, page }) => {
    const data = await fetch(
      `https://openlibrary.org/search.json?q=${q}&limit=${limit}&page=${page}`
    );
If you still have the command npm run watch running in your terminal you can restart the MCP inspector and see you can now add values for page and limit to see more results.
We also need to clean up the response of the tool, as it includes many fields we don't need. Remember, every character returned by the tool will be shared with the LLM you connect it to. This means that more characters increase your token count and thereby costs.
In the callback function we can add the following:
const json = await data.json();
let books = [];

if (json?.docs?.length > 0) {
  books = json.docs.map((book: any) => {
    const title = book.title;
    const author_name = book.author_name.join(", ");
    const first_publish_year = book.first_publish_year;
    const id = book.lending_edition_s;

    return { id, title, author_name, first_publish_year };
  });
}

return {
  content: [
    {
      type: "text",
      text: JSON.stringify(books),
    },
  ],
};
From the MCP inspector you can now see way less data is returned from the tool compared to before. This is because we are now only returning a subset of the data.
Finally, let's add some extra informaiton for the LLM before we use the tool in a MCP client like Claude Desktop. Add the following to the tool description:
Use the following format:

  q=title:flammable will find any books with "flammable" in the title field
  q=author:solnit will find authors with "solnit" in their name
  q=subject:tennis rules will find any books about "tennis" AND "rules"
  q=place:lisbon will find books about Lisbon
  q=person:rosa parks will look for people with rosa AND parks in their name
  q=language:spa will find any books with at least one edition in Spanish (most other language codes use the first three letters of the language except for Japanese which uses jpn There is also mul for multiple languages and und for undetermined)
  q=publisher:harper will looks for any books published by a publisher with "harper" in their name. (Publisher has never been a controlled field in the library world, so you can see we have a ton of variants of this famous publisher in the search facets.)
  q=publish_year:[* TO 1800] will find anything published before and up to the year 1800.

  You can also blend them together:

  q=subject:travel place:istanbul will look for books about travel in Istanbul.
  q=subject:dogs subject:("Juvenile fiction" OR "Juvenile literature") will look for children's books about dogs.
This description is a bit long, but it gives the LLM all the options on how to use the book search tool. You can try out these combinations in MCP Inspector yourself and remove any that you ecpect not to use.
Connect to a MCP Client
Now we have our server ready for use, let's connect to it from an MCP client. We'll start with the simplest possible example:
To use with Claude Desktop, open the server config:
- On MacOS:
/Users/USER_NAME/Library/Application Support/Claude/claude_desktop_config.json - On Windows:
%APPDATA%/Claude/claude_desktop_config.json
And add the following config:
{
  "mcpServers": {
    "mcp-open-libary": {
      "command": "node",
      "args": ["/path/to/mcp-open-library/build/index.js"]
    }
  }
}
You can now open Claude Desktop and you would see the new MCP server list. If you had Claude Desktop open before editing the config, you'll need to restart it for the changes to take effect.
Let's start with a simple query: "Retrieve all books written by JK Rowling". Claude should see the server we just set up and return the results.
We can also use Claude Desktop to run more complex queries against our MCP server. For example, let's try asking this question: "Show me books about wizards that take place in the United Kingdom".
Interacting with Claude Desktop will require you to approve the suggested tool call to the MCP server, this looks something like the following:
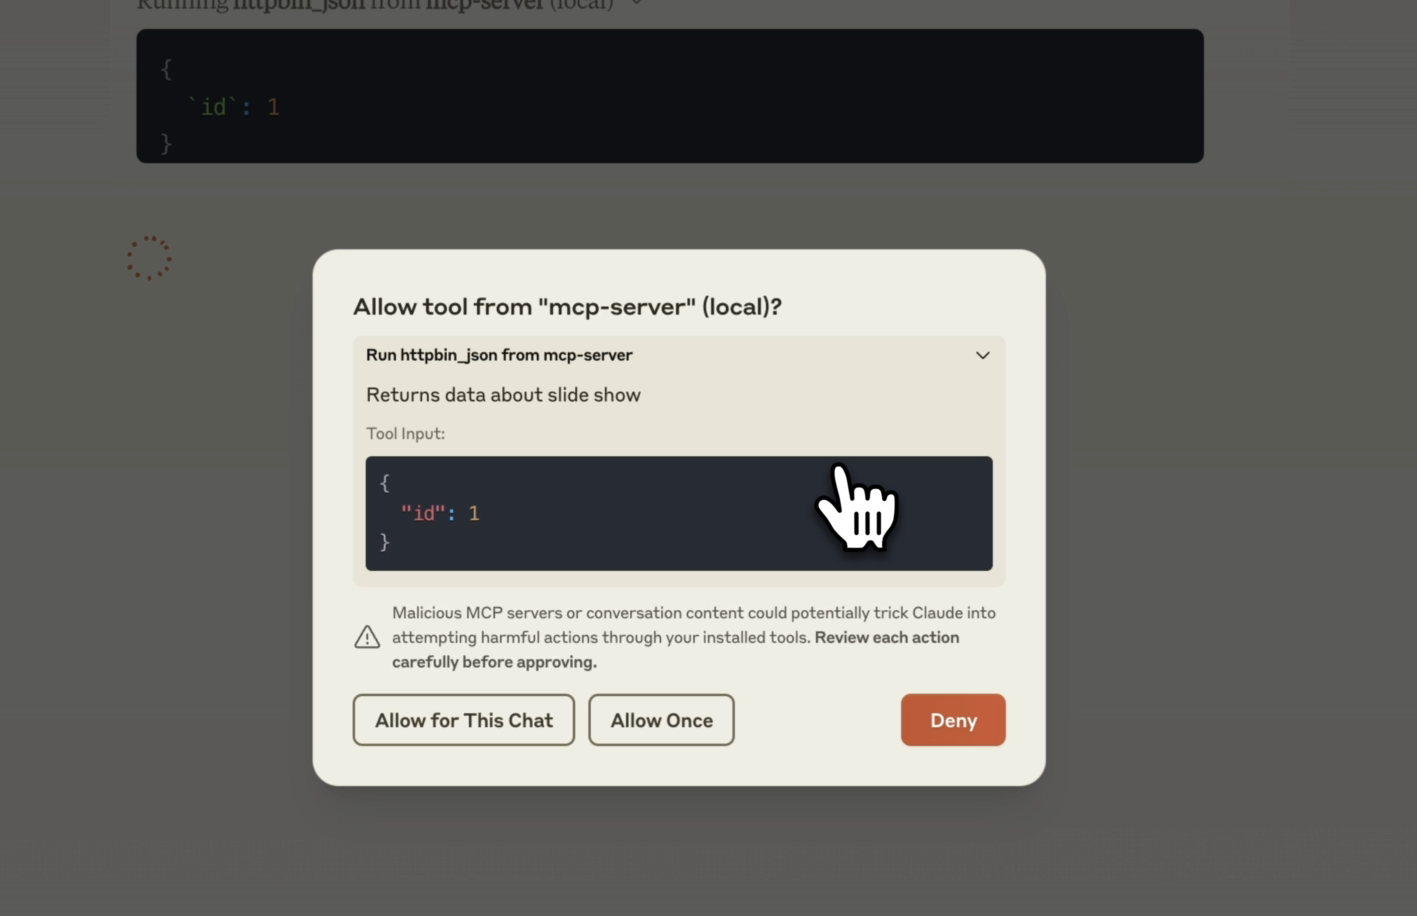 MCP server tool details in Claude Deskop
The tool calls that Claude now generates are more complex than a simple query and will be able to generate multiple queries for you. For example, it can generate a list of all books about wizards written by JK Rowling, or a list of all books about wizards that take place in the United Kingdom.
The search queries it generated are:
`q`: `subject:wizards place:\"united kingdom\"`
And
`q`: `subject:(wizards OR magic) place:(britain OR england OR \"united kingdom\" OR scotland)`
This will return a list of books that include the Harry Potter series but also the "The Chronicles of Narnia" series by C.S. Lewis (1950) and "Northern Lights" (part of "His Dark Materials") by Philip Pullman (1995).
What's next?
Building MCP servers becomes significantly easier when leveraging both LLMs and the MCP Inspector. They provide guidance and testing capabilities, helping you build efficient and reliable MCP servers faster.
If you found this tutorial helpful, don’t forget to share it with your network. For more content on AI and web development, subscribe to my YouTube channel and connect with me on LinkedIn, X or Bluesky.