Blog
Building a Project Management Board with React, TypeScript and Tailwind CSS
December 13, 2023 - Roy Derks
Last year I released the second edition of my book React Projects, and to celebrate this I'm sharing one of the projects from the book with you. In this detailed live coding session, we walk through building a Trello-style project management board from scratch using React, TypeScript, and Tailwind CSS. The end result is an interactive drag and drop board for organizing tasks into different workflow stages.
Click the image below to watch the YouTube video version of this blog post:
 VIDEO: Build a Project Management Board like Trello | React Projects Chapter 3
Getting started
Here's a high-level overview of what we'll cover:
- Setting up a new React project with Vite instead of Create React App
- Creating React components for the header, board, lanes, and tasks
- Passing data and functions between components
- Implementing drag and drop using browser Web APIs
- Replacing CSS with Tailwind classes
You will need to have Node and npm installed on your machine.
Setting up a new React project with Vite
Starting a new project with Vite is as easy as running a single command:
npx create-vite@latest
Upon running this command, you'll be prompted to answer a few questions, including the name for your new project. For this example, let's go with project-board. One of Vite's standout features is its compatibility with a range of JavaScript flavors and frameworks—not just React, but also Preact, Lit, Svelte, and even vanilla JavaScript. We select React as the framework, and opt to use TypeScript as well. Vite handles all the configuration for us and scaffolds the initial project files.
With the project generated, we need to move into the project directory and install the dependencies:
cd project-board
npm install
After the installation is complete, we can start the development server:
npm run dev
The starter Vite React app loads up in the browser, on the endpoint displayed in your terminal.
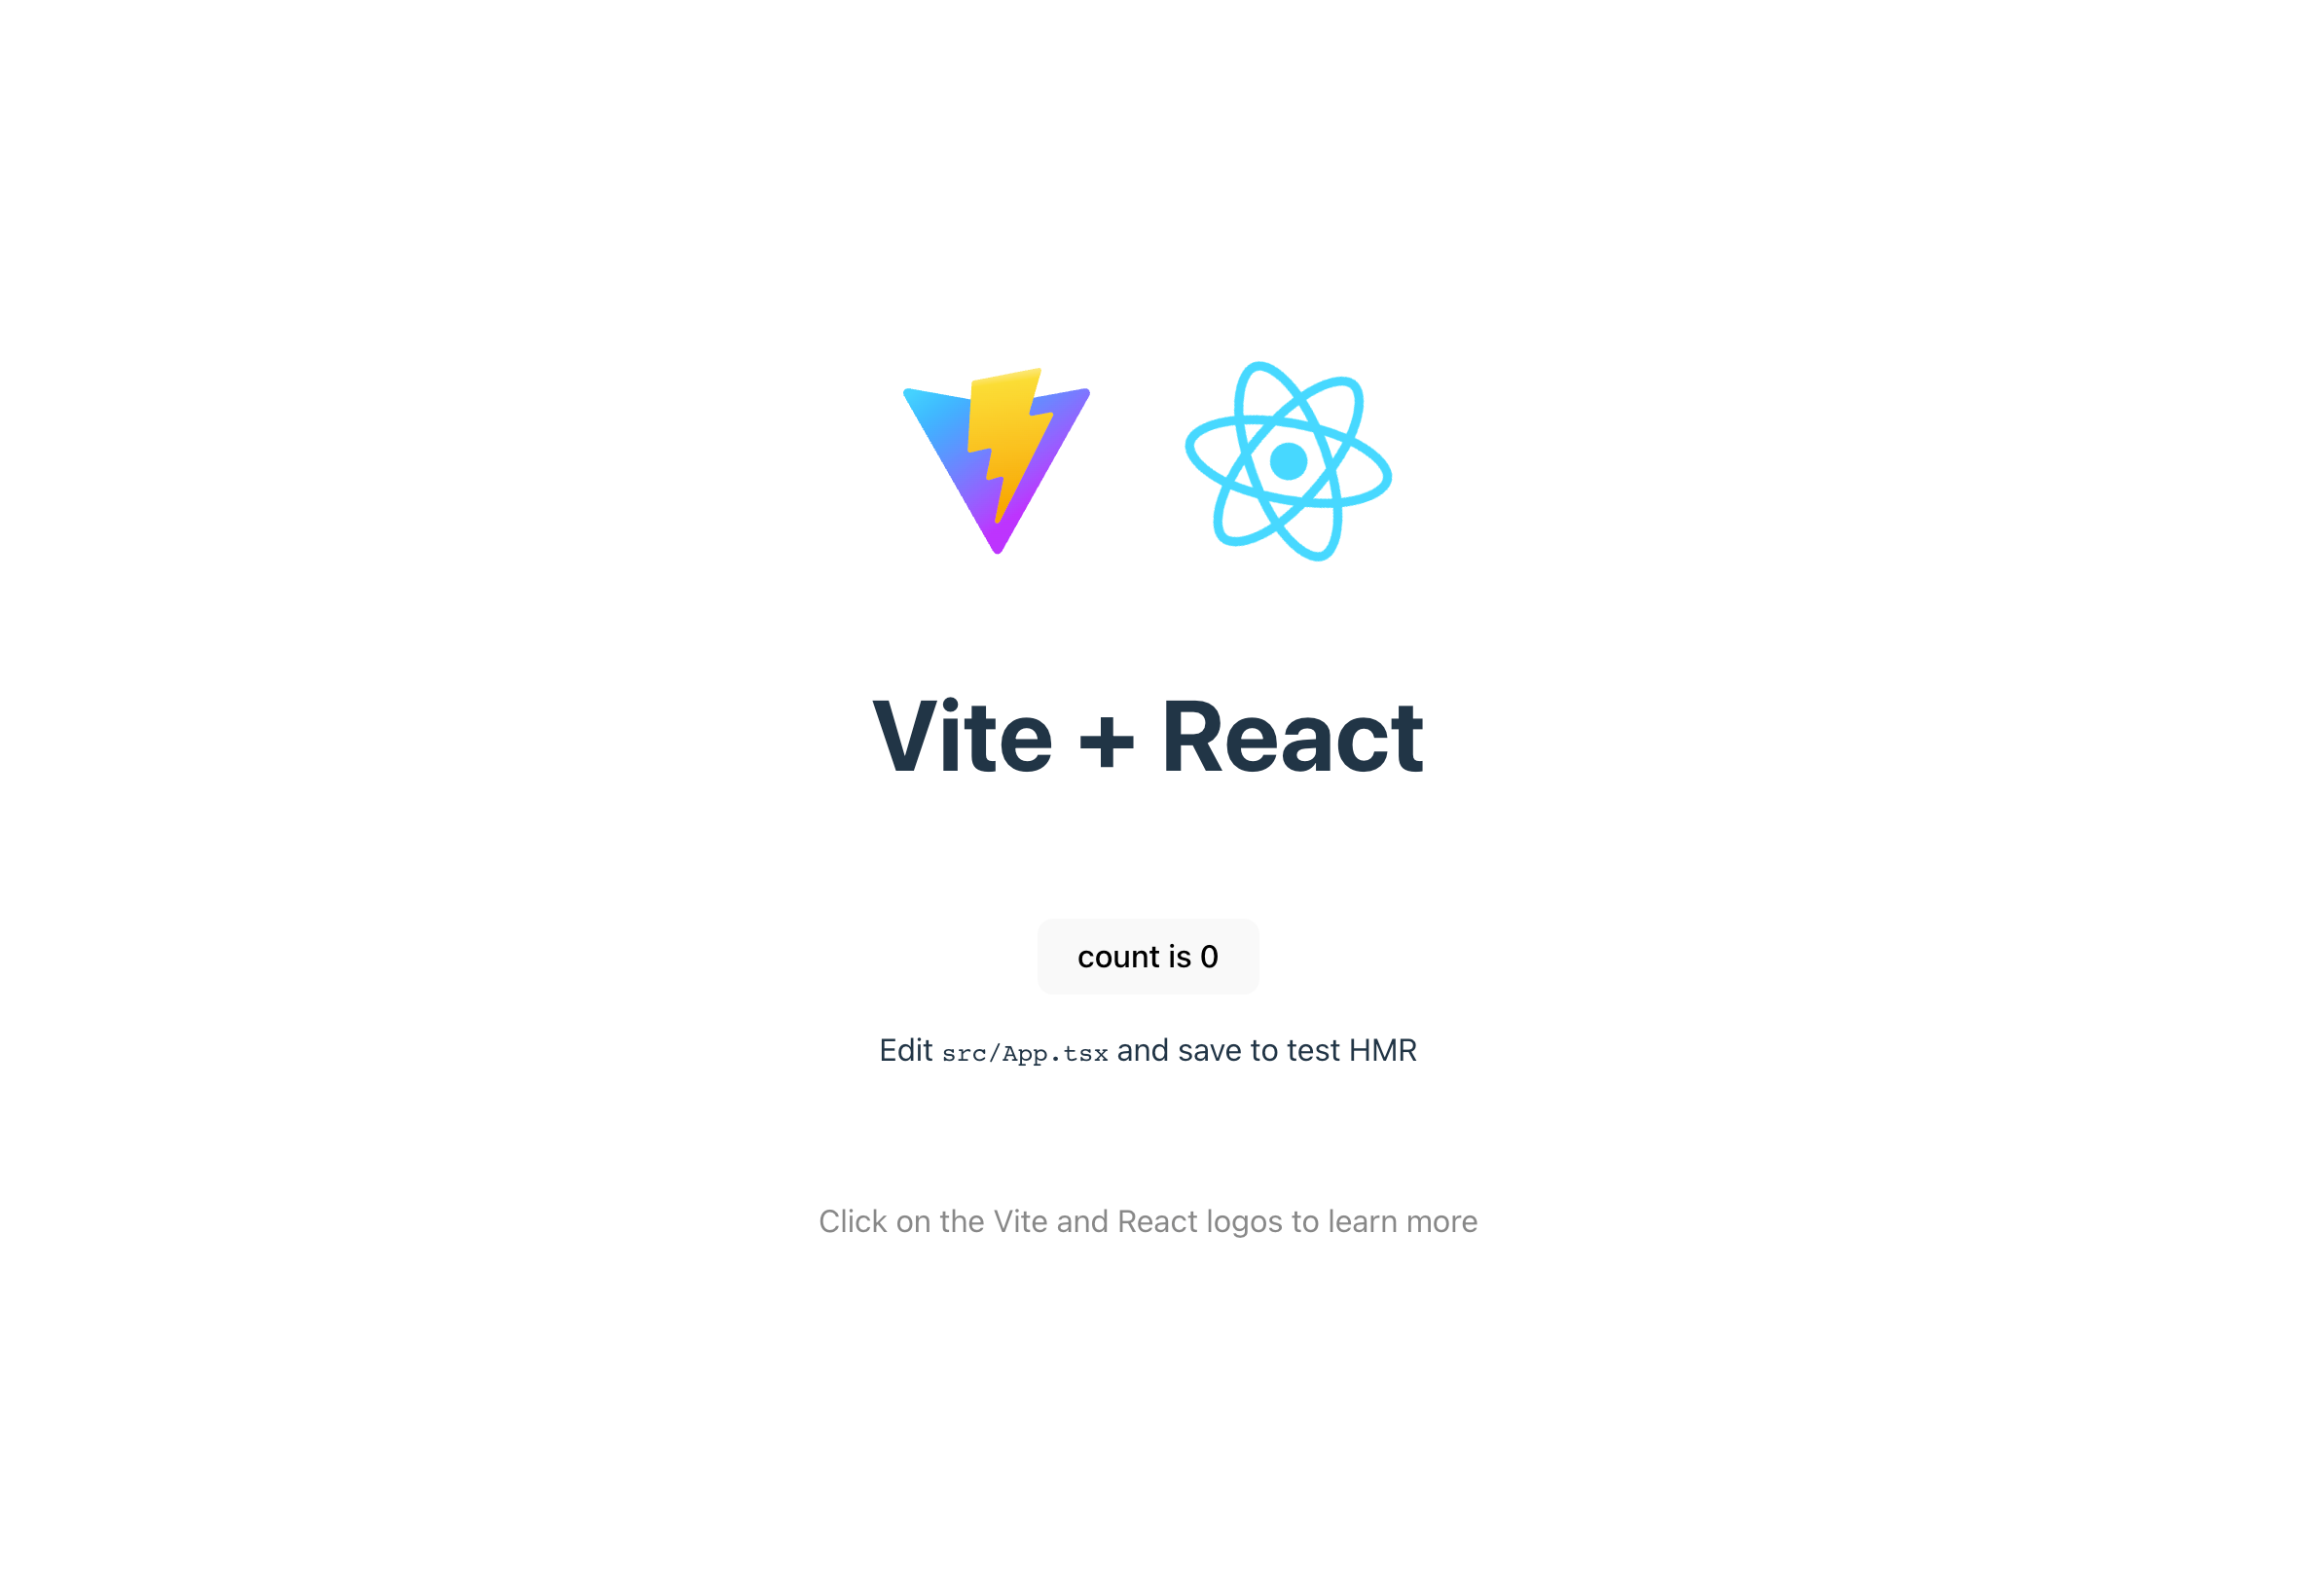 The starter Vite React app
Next step is to delete the boilerplate content, leaving just an <h1> with "Project Board" for our starting point. We also remove the .svg files and the import statement for it in src/App.tsx.
Creating React components
With a blank slate, we can begin creating React components for the major pieces of the project board:
Header- simple component that renders the titleBoard- main area that will contain the lanesLane- vertical column for a stage in the workflowTask- draggable ticket/card that lives inside a lane
Each component goes in its own file like src/components/Header/Header.tsx:
// src/components/Header/Header.tsx
export default function Header() {
    return (
        <div className="Header">
            <h1>Project Board</h1>
        </div>
    )
}
We can then import and render the Header component in src/App.tsx:
// src/App.tsx
import Header from './components/Header/Header'

export default function App() {
  return (
    <div className="App">
      <Header />
    </div>
  )
}
The Board component is next. It will contain the lanes, so we can start by creating a Lane component in a new file called src/components/Lane/Lane.tsx:
// src/components/Lane/Lane.tsx
export default function Lane() {
    return (
        <div className="Lane">
            <h2>Lane</h2>
        </div>
    )
}
And importing it into Board, which you can create a new file for at src/components/Board/Board.tsx:
// src/components/Board/Board.tsx
import Lane from '../Lane/Lane';

export default function Board() {
  return (
    <div className="Board">
      <Lane />
      <Lane />
      <Lane />
      <Lane />
    </div>
  )
}
Next, we'll create the Task component in src/components/Task/Task.tsx:
// src/components/Task/Task.tsx
export default function Task() {
    return (
        <div className="Task">
            <h3>Task</h3>
        </div>
    )
}
And finally, we can import and render the Board component in App.tsx:
// src/App.tsx
import Header from './components/Header/Header';
import Board from './components/Board/Board';

function App() {
  return (
    <div className="App">
      <Header />
      <Board />
    </div>
  )
}
From this point, we can start adding some basic styling to the components. We'll use "plain old" CSS for this first, and get to Tailwind CSS later:
-
Board- first create the styling filesrc/components/Board/Board.cssand add the following:/* src/components/Board/Board.css */ .Board { display: flex; flex-direction: row; justify-content: space-between; padding: 1rem; margin: 0 auto; max-width: 1200px; }And import it into
Board.tsxat the top:// src/components/Board/Board.tsx import './Board.css'; // Everything else... -
Lane- create the styling filesrc/components/Lane/Lane.cssand add the following:/* src/components/Lane/Lane.css */ .Lane { background-color: #DBEAFE; border-radius: 0.5rem; flex: 1; margin: 0 0.5rem; padding: 1rem; }And import it into
Lane.tsxat the top:// src/components/Lane/Lane.tsx import './Lane.css'; // Everything else... -
Task- create the styling filesrc/components/Task/Task.cssand add the following:/* src/components/Task/Task.css */ .Task { background-color: #fff; border-radius: 0.5rem; box-shadow: 0 0 0.5rem rgba(0, 0, 0, 0.1); margin: 0.5rem 0; padding: 1rem; }And import it into
Task.tsxat the top:// src/components/Task/Task.tsx import './Task.css'; // Everything else... -
Header- create the styling filesrc/components/Header/Header.cssand add the following:/* src/components/Header/Header.css */ .Header { background-color: #e5e7eb; box-shadow: 0 0 0.5rem rgba(0, 0, 0, 0.1); padding: 1rem; text-align: center; }And import it into
Header.tsxat the top:// src/components/Header/Header.tsx import './Header.css'; // Everything else...
Make sure to import the CSS files into the components, otherwise the styles won't be applied, the application will look like this:
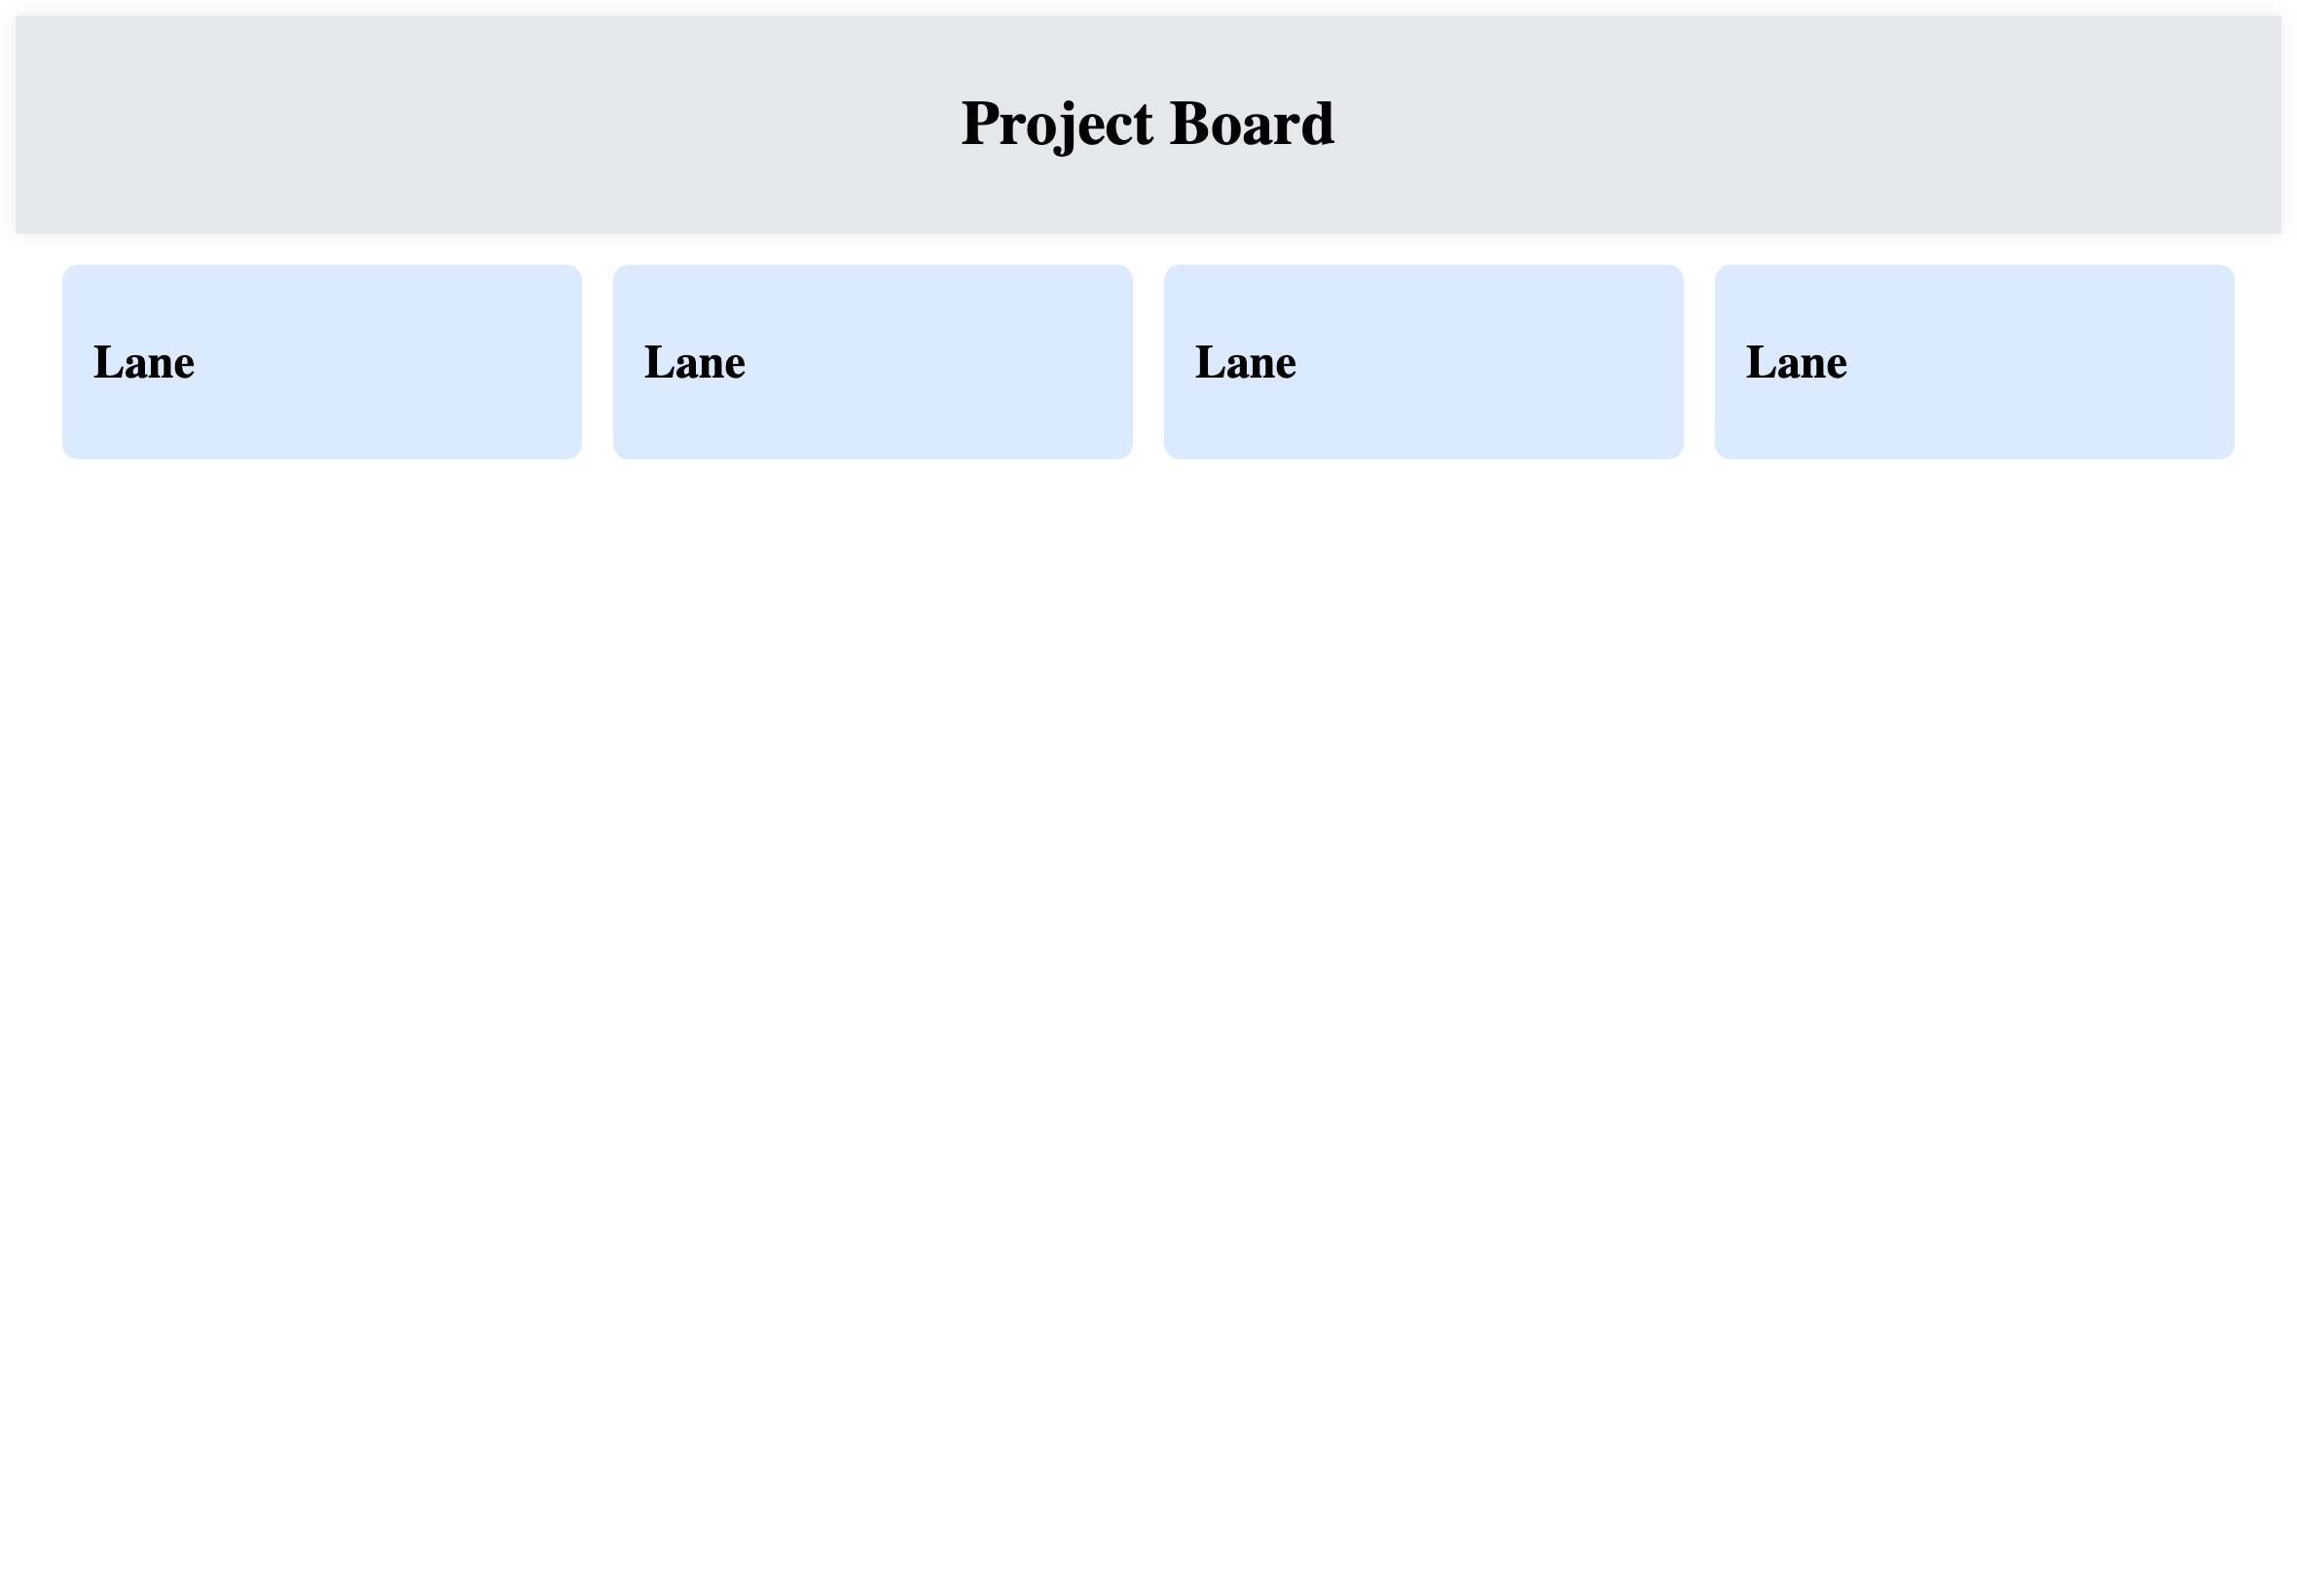 Project Board with basic styling
With the basic styling in place, we can start adding some content to the components to make them look more like a project management board.
Passing data and functions between components
To pass data and functions between components, we'll use props. In React, props are used to pass data from a parent component to a child component. Props are passed to components via HTML attributes, and are accessed in the component via the props object.
Let's start by adding some props to the Lane component. We'll add a title prop to the Lane component, and pass it in from the Board component. As we're using TypeScript, we'll also add a type for the title prop:
// src/components/Lane/Lane.tsx
import './Lane.css';

type LaneProps = {
    title: string;
}

export default function Lane({ title }: LaneProps) {
    return (
        <div className="Lane">
            <h2>{title}</h2>
        </div>
    )
}
And in the Board component, we'll pass in the title prop to each Lane component. We'll create an object for each lane, with an id and title property:
// src/components/Board/Board.tsx
import Lane from "../Lane/Lane";

const lanes = [
    {
        id: 1,
        title: "To Do",
    },
    {
        id: 2,
        title: "In Progress",
    },
    {
        id: 3,
        title: "Review",
    },
    {
        id: 4,
        title: "Done",
    }
]

export default function Board() {
  return (
    <div className="Board">
      {lanes.map(lane => (
        <Lane
          key={lane.id}
          id={lane.id}
          title={lane.title}
        />
      ))}
    </div>
  )
}
We're also passing the prop id to the Lane component, which we'll use later to identify the lane when we implement drag and drop. In the Lane component, we'll already create a type for the id prop:
// src/components/Lane/Lane.tsx
import './Lane.css';

type LaneProps = {
    id: number;
    title: string;
}

export default function Lane({ id, title }: LaneProps) {
    return (
        <div className="Lane">
            <h2>{title}</h2>
        </div>
    )
}
We can now see the lane titles in the browser, but first we'll add some task to fill our page a bit more. We'll use a basic state hook to store the tasks in the Board component:
// src/components/Board/Board.tsx
import { useState } from "react";

// ...

export default function Board() {
    const [tasks, setTasks] = useState([
        {
            "id": 1,
            "title": "Fix navigation bug",
            "body": "Lorem ipsum dolor sit amet, consectetur adipiscing elit. Quisque egestas dictum libero, vel tristique odio pulvinar vitae.",
            "laneId": 1
        },
        {
            "id": 2,
            "title": "Release new website",
            "body": "hasellus eleifend lacus vitae est ultrices placerat. Nunc at risus id risus venenatis laoreet sit amet cursus neque.",
            "laneId": 2
        },
        {
            "id": 3,
            "title": "Change button color",
            "body": "Suspendisse ac lorem a neque tempus luctus non aliquam sapien. Cras ut lacus bibendum, placerat nibh eu, tempus neque.",
            "laneId": 3
        },
        {
            "id": 4,
            "title": "Deploy server on acceptance environment",
            "body": "Pellentesque pharetra fermentum sapien, aliquet ultrices ligula mattis porttitor.",
            "laneId": 3
        },
        {
            "id": 5,
            "title": "Change layout for the content page",
            "body": "Cras tellus ligula, mattis at facilisis eu, ultricies vel elit. Ut aliquam volutpat lacus, a rutrum sem vulputate non.",
            "laneId": 3
        },
        {
            "id": 6,
            "title": "Complete the registration flow",
            "body": "In vel commodo ipsum. Duis id ipsum semper, condimentum ipsum sit amet, maximus massa.",
            "laneId": 4
        },
        {
            "id": 7,
            "title": "Create new database instance",
            "body": " Curabitur nec sem lorem. Donec venenatis, arcu vitae malesuada consequat, dolor ante placerat mi, in fermentum diam ipsum id libero.",
            "laneId": 4
        }
    ])

    // Everything else...

}
The values in the laneId property correspond to the id of the lane. We'll use this to filter the tasks and render them in the correct lane. We'll pass the tasks state to the Lane component as a prop, and filter the tasks based on the laneId:
// src/components/Board/Board.tsx

// ...

export default function Board() {
    // ...

    return (
        <div className="Board">
            {lanes.map(lane => (
                <Lane
                    key={lane.id}
                    id={lane.id}
                    title={lane.title}
                    tasks={tasks.filter(task => task.laneId === lane.id)}
                />
            ))}
        </div>
    )
}
In the Lane component, we'll add a type for the tasks prop, and import the component we need to render the tasks in the lane:
// src/components/Lane/Lane.tsx
import './Lane.css';
import Task from "../Task/Task";

type LaneProps = {
    id: number;
    title: string;
    tasks: {
        id: number;
        title: string;
        body: string;
        laneId: number;
    }[];
}

export default function Lane({ id, title, tasks }: LaneProps) {

  // ...

}
And render the tasks in the Lane component by mapping over the tasks prop and rendering a Task component for each task:
// src/components/Lane/Lane.tsx
// ...

export default function Lane({ id, title, tasks }: LaneProps) {
    return (
        <div className="Lane">
            <h2>{title}</h2>
            <div>
                {
                    tasks.map((task) => {
                        return (
                            <Task
                                key={task.id}
                                id={task.id}
                                title={task.title}
                                body={task.body}
                                laneId={task.laneId}
                            />
                        )
                    })
                }
            </div>
        </div>
    )
}
Finally, we need to update the Task component to accept the new props:
// src/components/Task/Task.tsx
import './Task.css';

type TaskProps = {
    id: number;
    title: string;
    body: string;
    laneId: number;
}

export default function  Task({ id, title, body, laneId }: TaskProps) {
    return (
        <div className="Task">
            <h3>{title}</h3>
            <p>{body}</p>
        </div>
    )
}
In the browser, we can now see the tasks in the correct lanes:
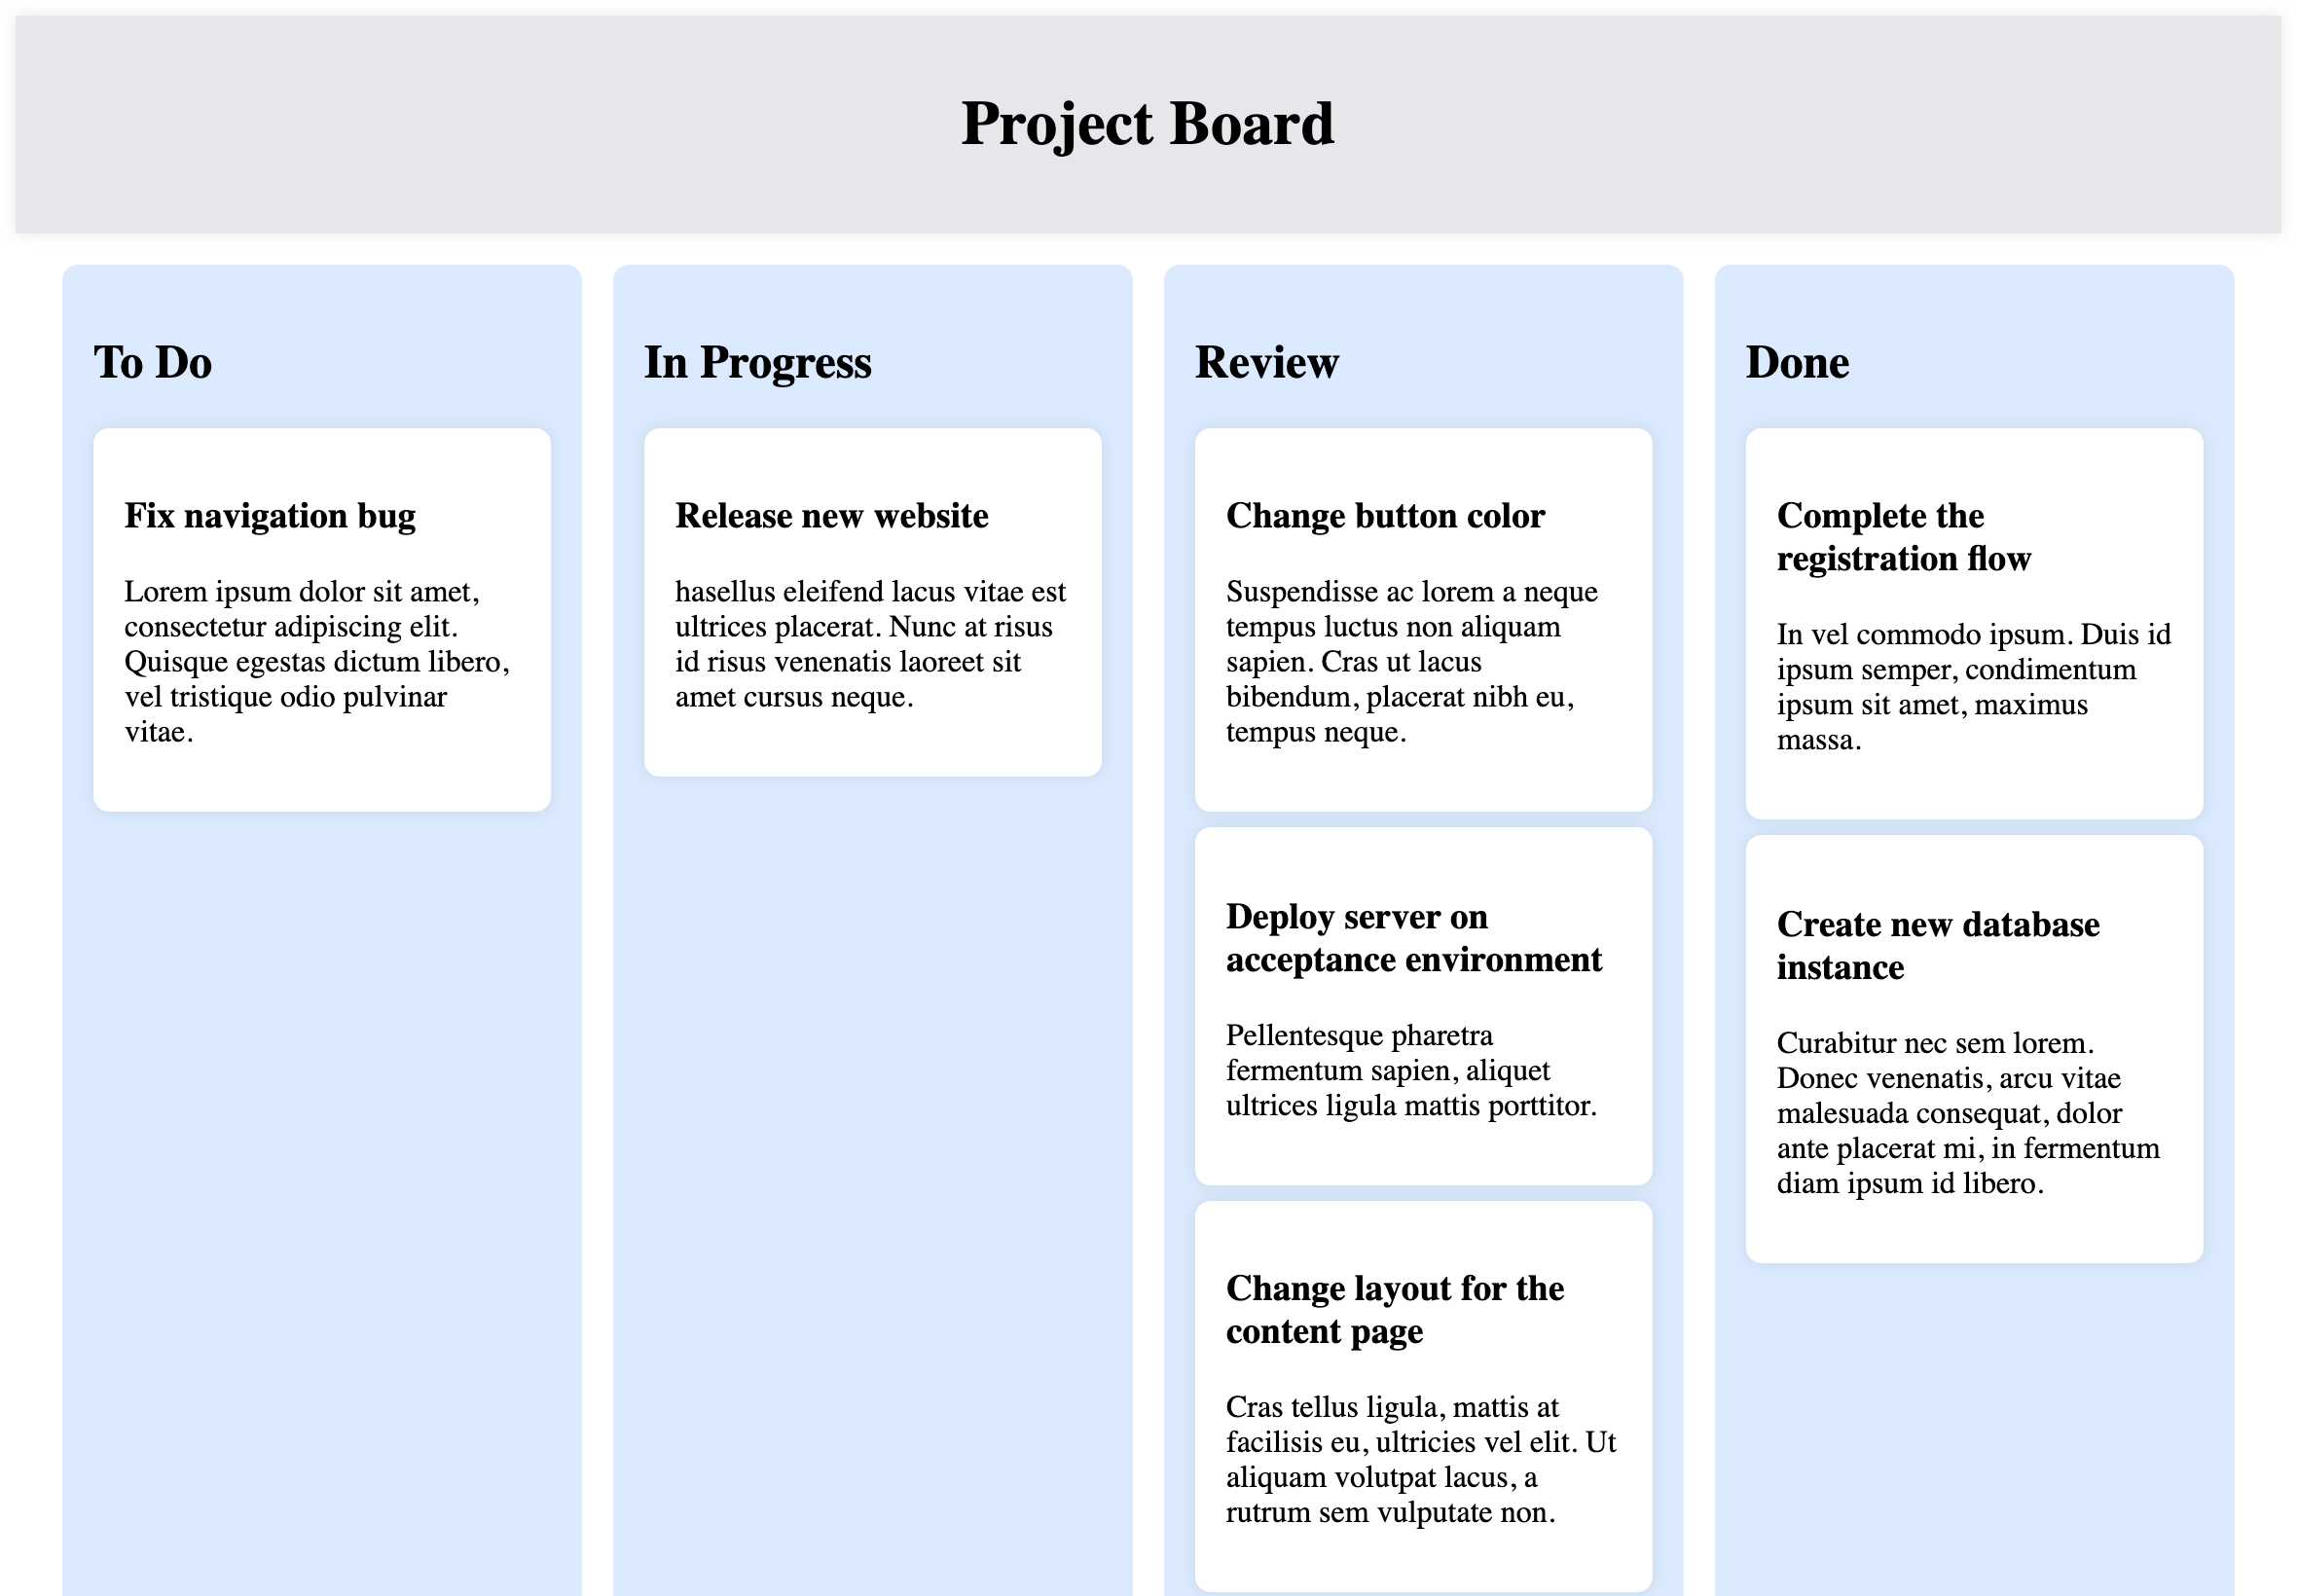 Project Board with tasks
Fantastic! We now have a basic project board with lanes and tasks. Next, we'll implement drag and drop to make the tasks draggable between lanes.
Implementing drag and drop using browser Web APIs
To make the tasks draggable, we utilize the browser's native drag and drop API. The drag and drop API consists of a set of events that are fired when a draggable element is dragged, dropped, or dragged over another element. We'll use the following events:
dragstart- fired when the user starts dragging an elementdragover- fired when the user drags an element over another elementdrop- fired when the user drags an element over another element
First, we'll create two functions that handle the dragstart and dragover events. This function will be called when the user starts dragging a task. We'll add the function to the Board component:
// src/components/Board/Board.tsx
// ...

function handleOnDragStart(event: React.DragEvent, id: number) {
    console.log('Drag event started', { id })
    event.dataTransfer.setData("id", id.toString());
}

function handleOnDragOver(event: React.DragEvent) {
    event.preventDefault();
}

export default function Board() {
    // ...

        return (
        <div className="Board">
            {lanes.map(lane => (
                <Lane
                    key={lane.id}
                    id={lane.id}
                    title={lane.title}
                    tasks={tasks.filter(task => task.laneId === lane.id)}
                    handleOnDragStart={handleOnDragStart}
                    handleOnDragOver={handleOnDragOver}
                    handleOnDrop={handleOnDrop}
                />
            ))}
        </div>
    )
}
The handleOnDragStart function takes two arguments: the event object and the id of the task. We'll use the id to identify the task when we drop it in another lane. The handleOnDragOver function takes only the event object as an argument. We'll use this function to prevent the default behavior of the dragover event, which is to not allow dropping on an element.
We'll need to add the onDragStart and onDragOver event handlers to the Lane and Task components, and pass in the functions we just created:
Lane:
First, add the functions to the types and props for the component:
// src/components/Lane/Lane.tsx

// ...

type LaneProps = {
    id: number;
    title: string;
    tasks: {
        id: number;
        title: string;
        body: string;
        laneId: number;
    }[];
    handleOnDragStart: (event: React.DragEvent, id: number) => void;
    handleOnDragOver: (event: React.DragEvent) => void;
}

export default function Lane({ id, title, tasks, handleOnDragStart, handleOnDragOver }: LaneProps) {
  // ...

}
Then, pass the functions to the onDragStart and onDragOver event handlers or the component:
// src/components/Lane/Lane.tsx
// ...

    return (
        <div
          className="Lane"
          onDragOver={handleOnDragOver}
        >
            <h2>{title}</h2>
            <div>
                {
                    tasks.map((task) => {
                        return (
                            <Task
                                key={task.id}
                                id={task.id}
                                title={task.title}
                                body={task.body}
                                laneId={task.laneId}
                                handleOnDragStart={handleOnDragStart}
                            />
                        )
                    })
                }
            </div>
        </div>
    )
}
Task:
We passed the function handleOnDragStart to the Task component as a prop, and now add it to the types and props for the component. Also, we add the onDragStart event handler and the draggable attribute to the Task component:
// src/components/Task/Task.tsx
// ...

export default function  Task({ id, title, body, laneId }: TaskProps) {
    return (
        <div
          className="Task"
          draggable
        >
            <h3>{title}</h3>
            <p>{body}</p>
        </div>
    )
}
You can now drag the tasks around, but they don't do anything yet. We'll create a function to handle the drop event, and add it to the Board component:
// src/components/Board/Board.tsx
// ...

export default function Board() {
    // ...

    function handleOnDrop(event: React.DragEvent, laneId: number) {
        const id = event.dataTransfer.getData("id");

        const task = tasks.find((task) => task.id === parseInt(id));

        if (task) {
            const newTasks = tasks.filter((task) => task.id !== parseInt(id));
            setTasks(newTasks.concat({ ...task, laneId }));
        }
    }

    return (
      // ...
    )
}
The handleOnDrop function takes two arguments: the event object and the laneId of the lane where the task is dropped. We'll use the laneId to update the laneId of the task. We'll also use the event object to get the id of the task that is being dropped. We'll use this id to identify the task in the tasks array, and update the laneId of the task.
We'll need to pass the handleOnDrop function to the Lane component:
// src/components/Board/Board.tsx
// ...

    return (
        <div className="Board">
            {lanes.map(lane => (
                <Lane
                    key={lane.id}
                    id={lane.id}
                    title={lane.title}
                    tasks={tasks.filter(task => task.laneId === lane.id)}
                    handleOnDrop={handleOnDrop}
                />
            ))}
        </div>
    )
}
And add it to the types and props for the Lane component, where the onDrop event handler is also added to the div element. The function is called with the event object and the id of the lane:
// src/components/Lane/Lane.tsx
// ...

type LaneProps = {
    // ...
    handleOnDragStart: (event: React.DragEvent, id: number) => void;
    handleOnDragOver: (event: React.DragEvent) => void;
    handleOnDrop: (event: React.DragEvent, laneId: number) => void;
}

export default function Lane({ id, title, tasks, handleOnDragStart, handleOnDragOver, handleOnDrop }: LaneProps) {
    return (
        <div
            className="Lane"
            onDragOver={handleOnDragOver}
            onDrop={(event) => handleOnDrop(event, id)}
        >
            // ...
    )
}
Et voilà! You can now drag the tasks between lanes!
Replacing CSS with Tailwind classes
Now that we have the drag and drop functionality in place, we can start replacing the CSS with Tailwind classes. Tailwind makes it easy to style your components without having to write any CSS. In some ways it's comparable to Bootstrap, which is one of the easiest was to style React applications. We'll start by installing Tailwind and its dependencies, and then configure it to work with Vite:
npm install -D tailwindcss postcss autoprefixer
npx tailwindcss init -p
You can find the most recent installation guide for Vite and Tailwind here.
Once the installation is complete, we'll need to configure Tailwind to work with Vite. We'll do this by adding the following to the tailwind.config.ts file, which is created by the npx tailwindcss init -p command:
// tailwind.config.ts
/** @type {import('tailwindcss').Config} */
export default {
  content: [
    "./index.html",
    "./src/**/*.{js,ts,jsx,tsx}",
  ],
  theme: {
    extend: {},
  },
  plugins: [],
}
Tailwind is now configured to work with Vite. We'll need to import the Tailwind CSS files with base styling into the src/index.css file:
@tailwind base;
@tailwind components;
@tailwind utilities;
Make sure to check if the index.css file is imported in the src/main.tsx file. If not, add the following line to the top of the file:
// src/main.tsx
import './index.css'

// Everything else...
Restart the development server, and you should see the Tailwind styles applied to the application.
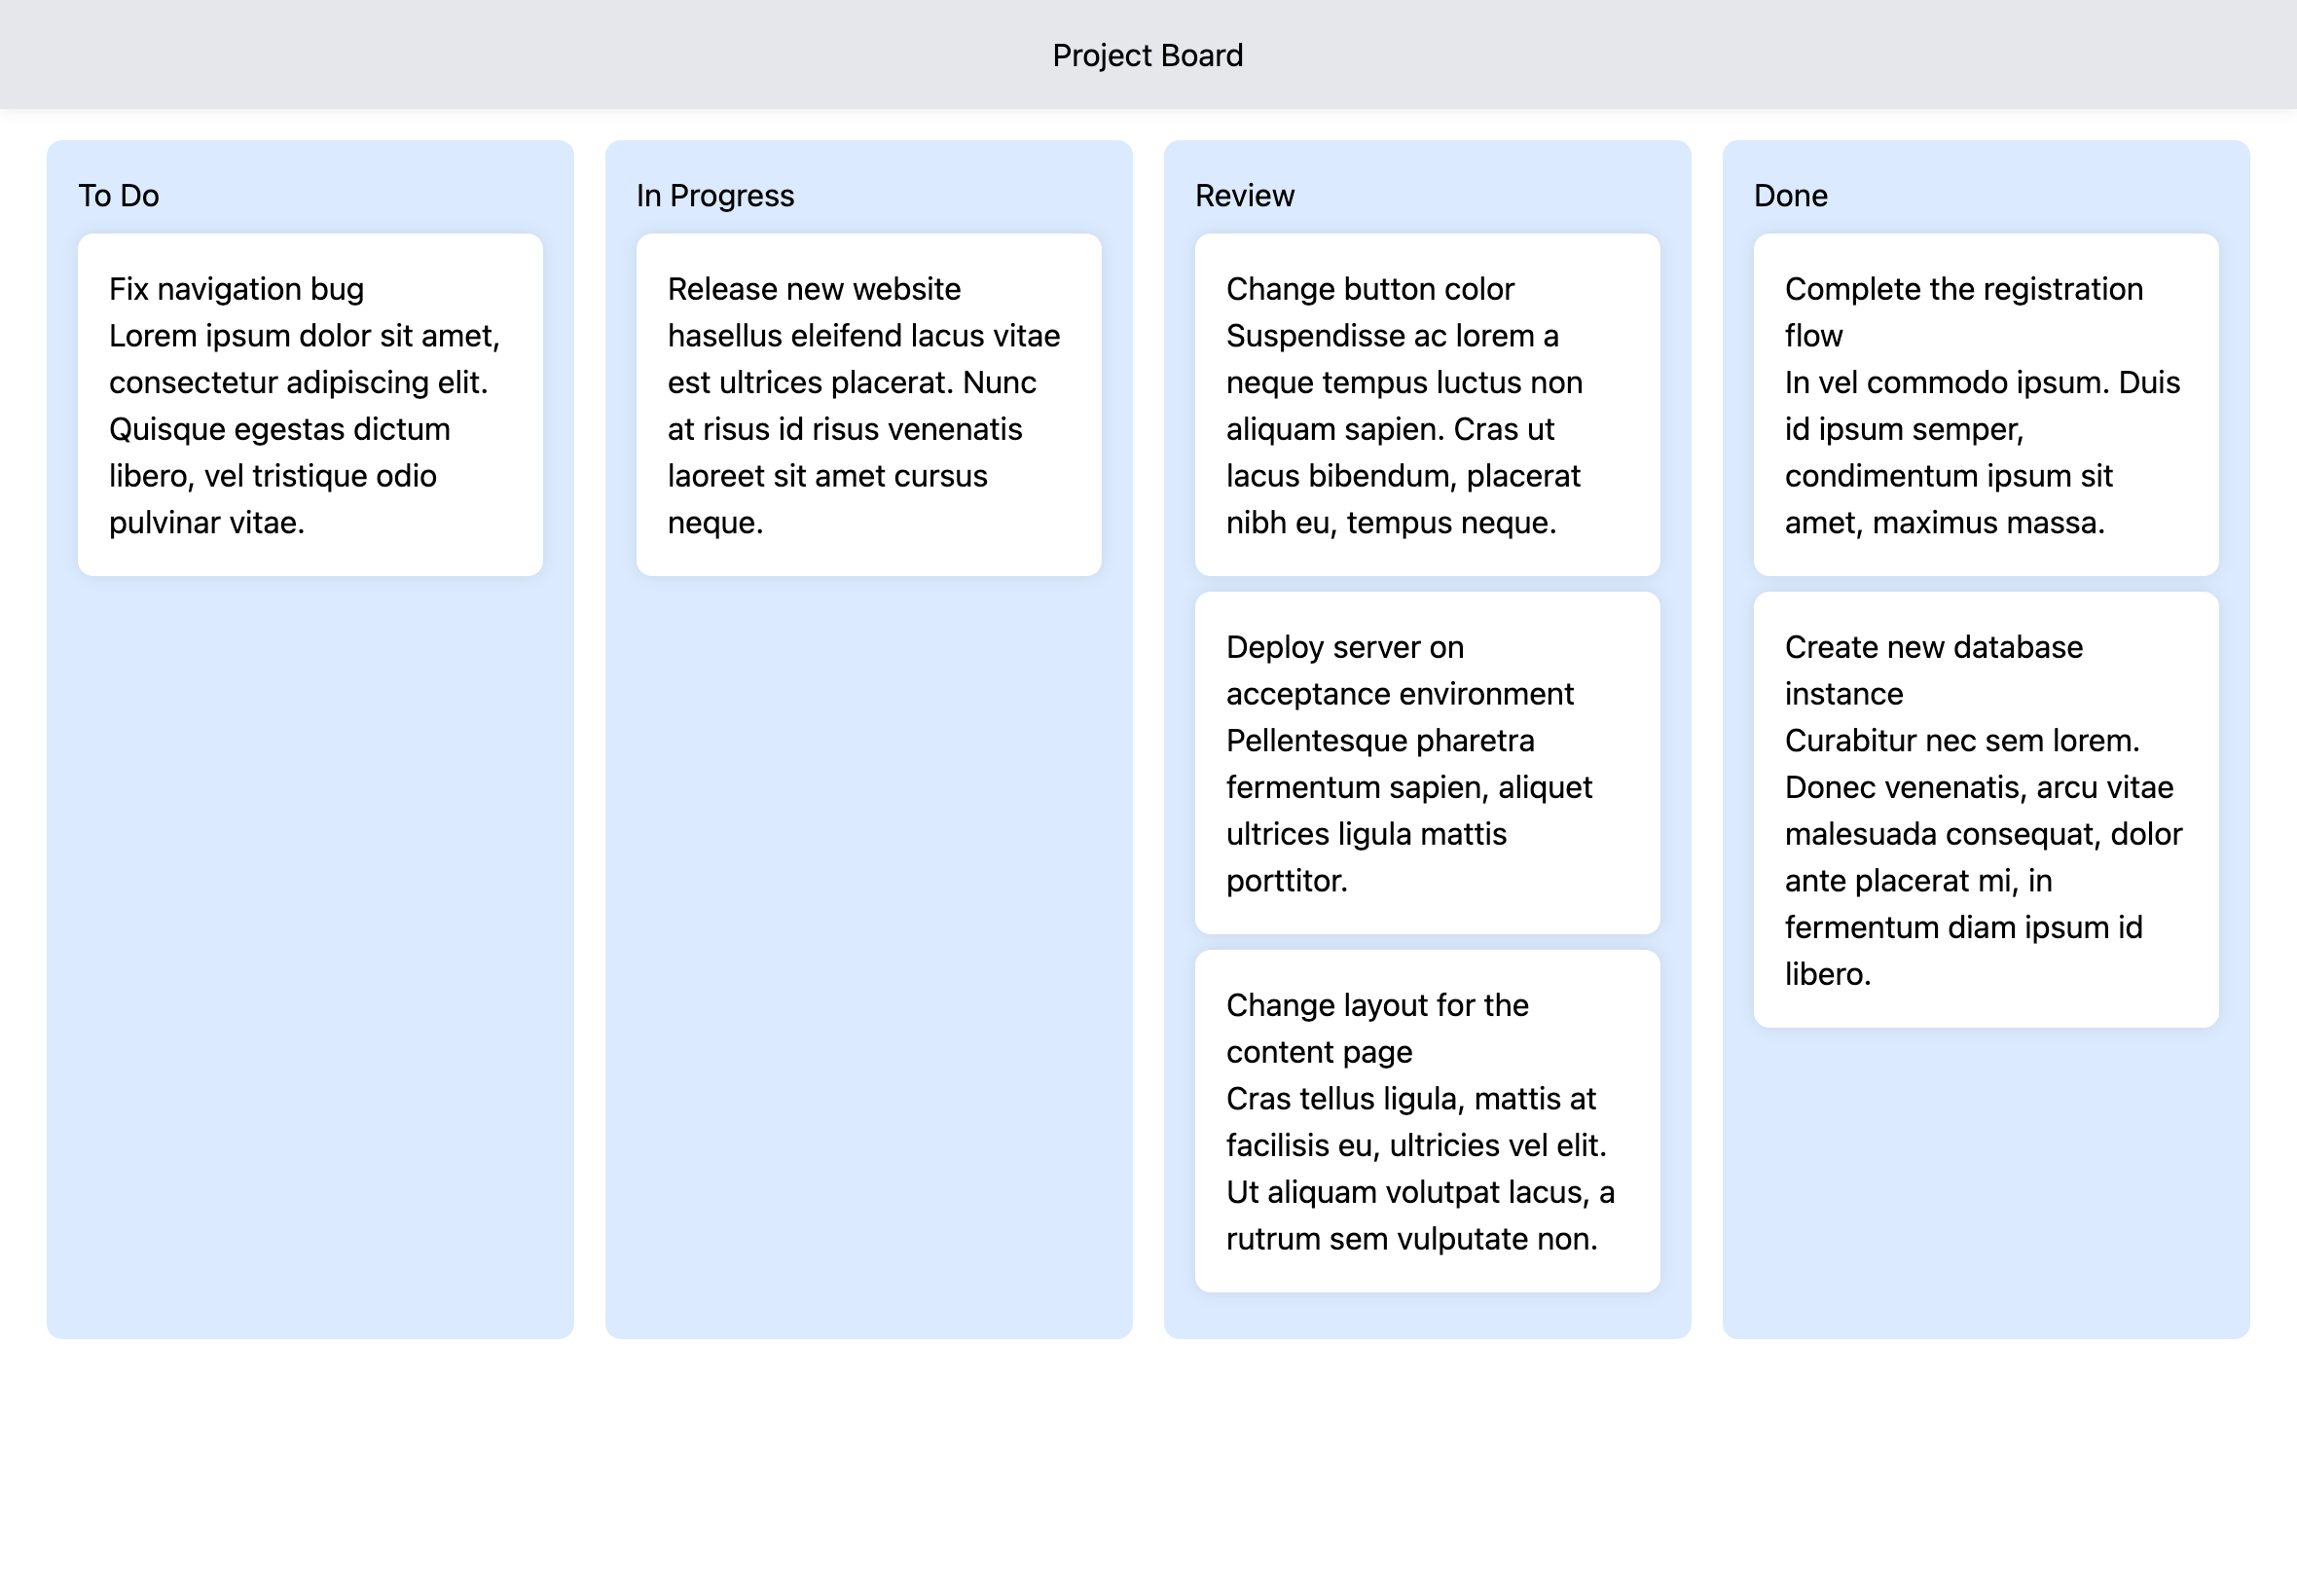 Project Board with Tailwind CSS
We can now start replacing the CSS with Tailwind classes. We'll start with the Board component, and replace the CSS with Tailwind classes. Also, the import statement for the Board.css CSS file can be removed:
// src/components/Board/Board.tsx
// ...

    return (
        <div className="grid grid-cols-4 gap-4">
            {lanes.map(lane => (
                <Lane
                    key={lane.id}
                    id={lane.id}
                    title={lane.title}
                    tasks={tasks.filter(task => task.laneId === lane.id)}
                    handleOnDragStart={handleOnDragStart}
                    handleOnDragOver={handleOnDragOver}
                    handleOnDrop={handleOnDrop}
                />
            ))}
        </div>
    )
}
Next, we'll replace the CSS in the Lane component with Tailwind classes. We'll also remove the import statement for the Lane.css CSS file:
// src/components/Lane/Lane.tsx
// ...

  return (
    <div
      className="bg-blue-100 p-4"
      onDragOver={handleOnDragOver}
      onDrop={(event) => handleOnDrop(event, id)}
    >
      <h2 className="text-center text-xl font-bold mb-4">{title}</h2>
      <div>
        // ...

  )
}
Also, we'll replace the CSS in the Task component with Tailwind classes. We'll also remove the import statement for the Task.css CSS file:
// src/components/Task/Task.tsx
// ...

  return (
    <div
      className="bg-white border border-gray-400 p-4 rounded-lg mb-4"
      draggable
      onDragStart={(event) => handleOnDragStart(event, id)}
    >
      <h3>{title}</h3>
      <p>{body}</p>
    </div>
  )
}
And finally, we'll replace the CSS in the Header component with Tailwind classes. We'll also remove the import statement for the Header.css CSS file:
// src/components/Header/Header.tsx
export default function Header() {
    return (
        <div className="bg-blue-600 white p-6 mb-4">
            <h1 className="text-center text-white text-6xl">Project Board</h1>
        </div>
    )
}
And that's it! We now have a fully functional project management board built with React, TypeScript, and Tailwind CSS.
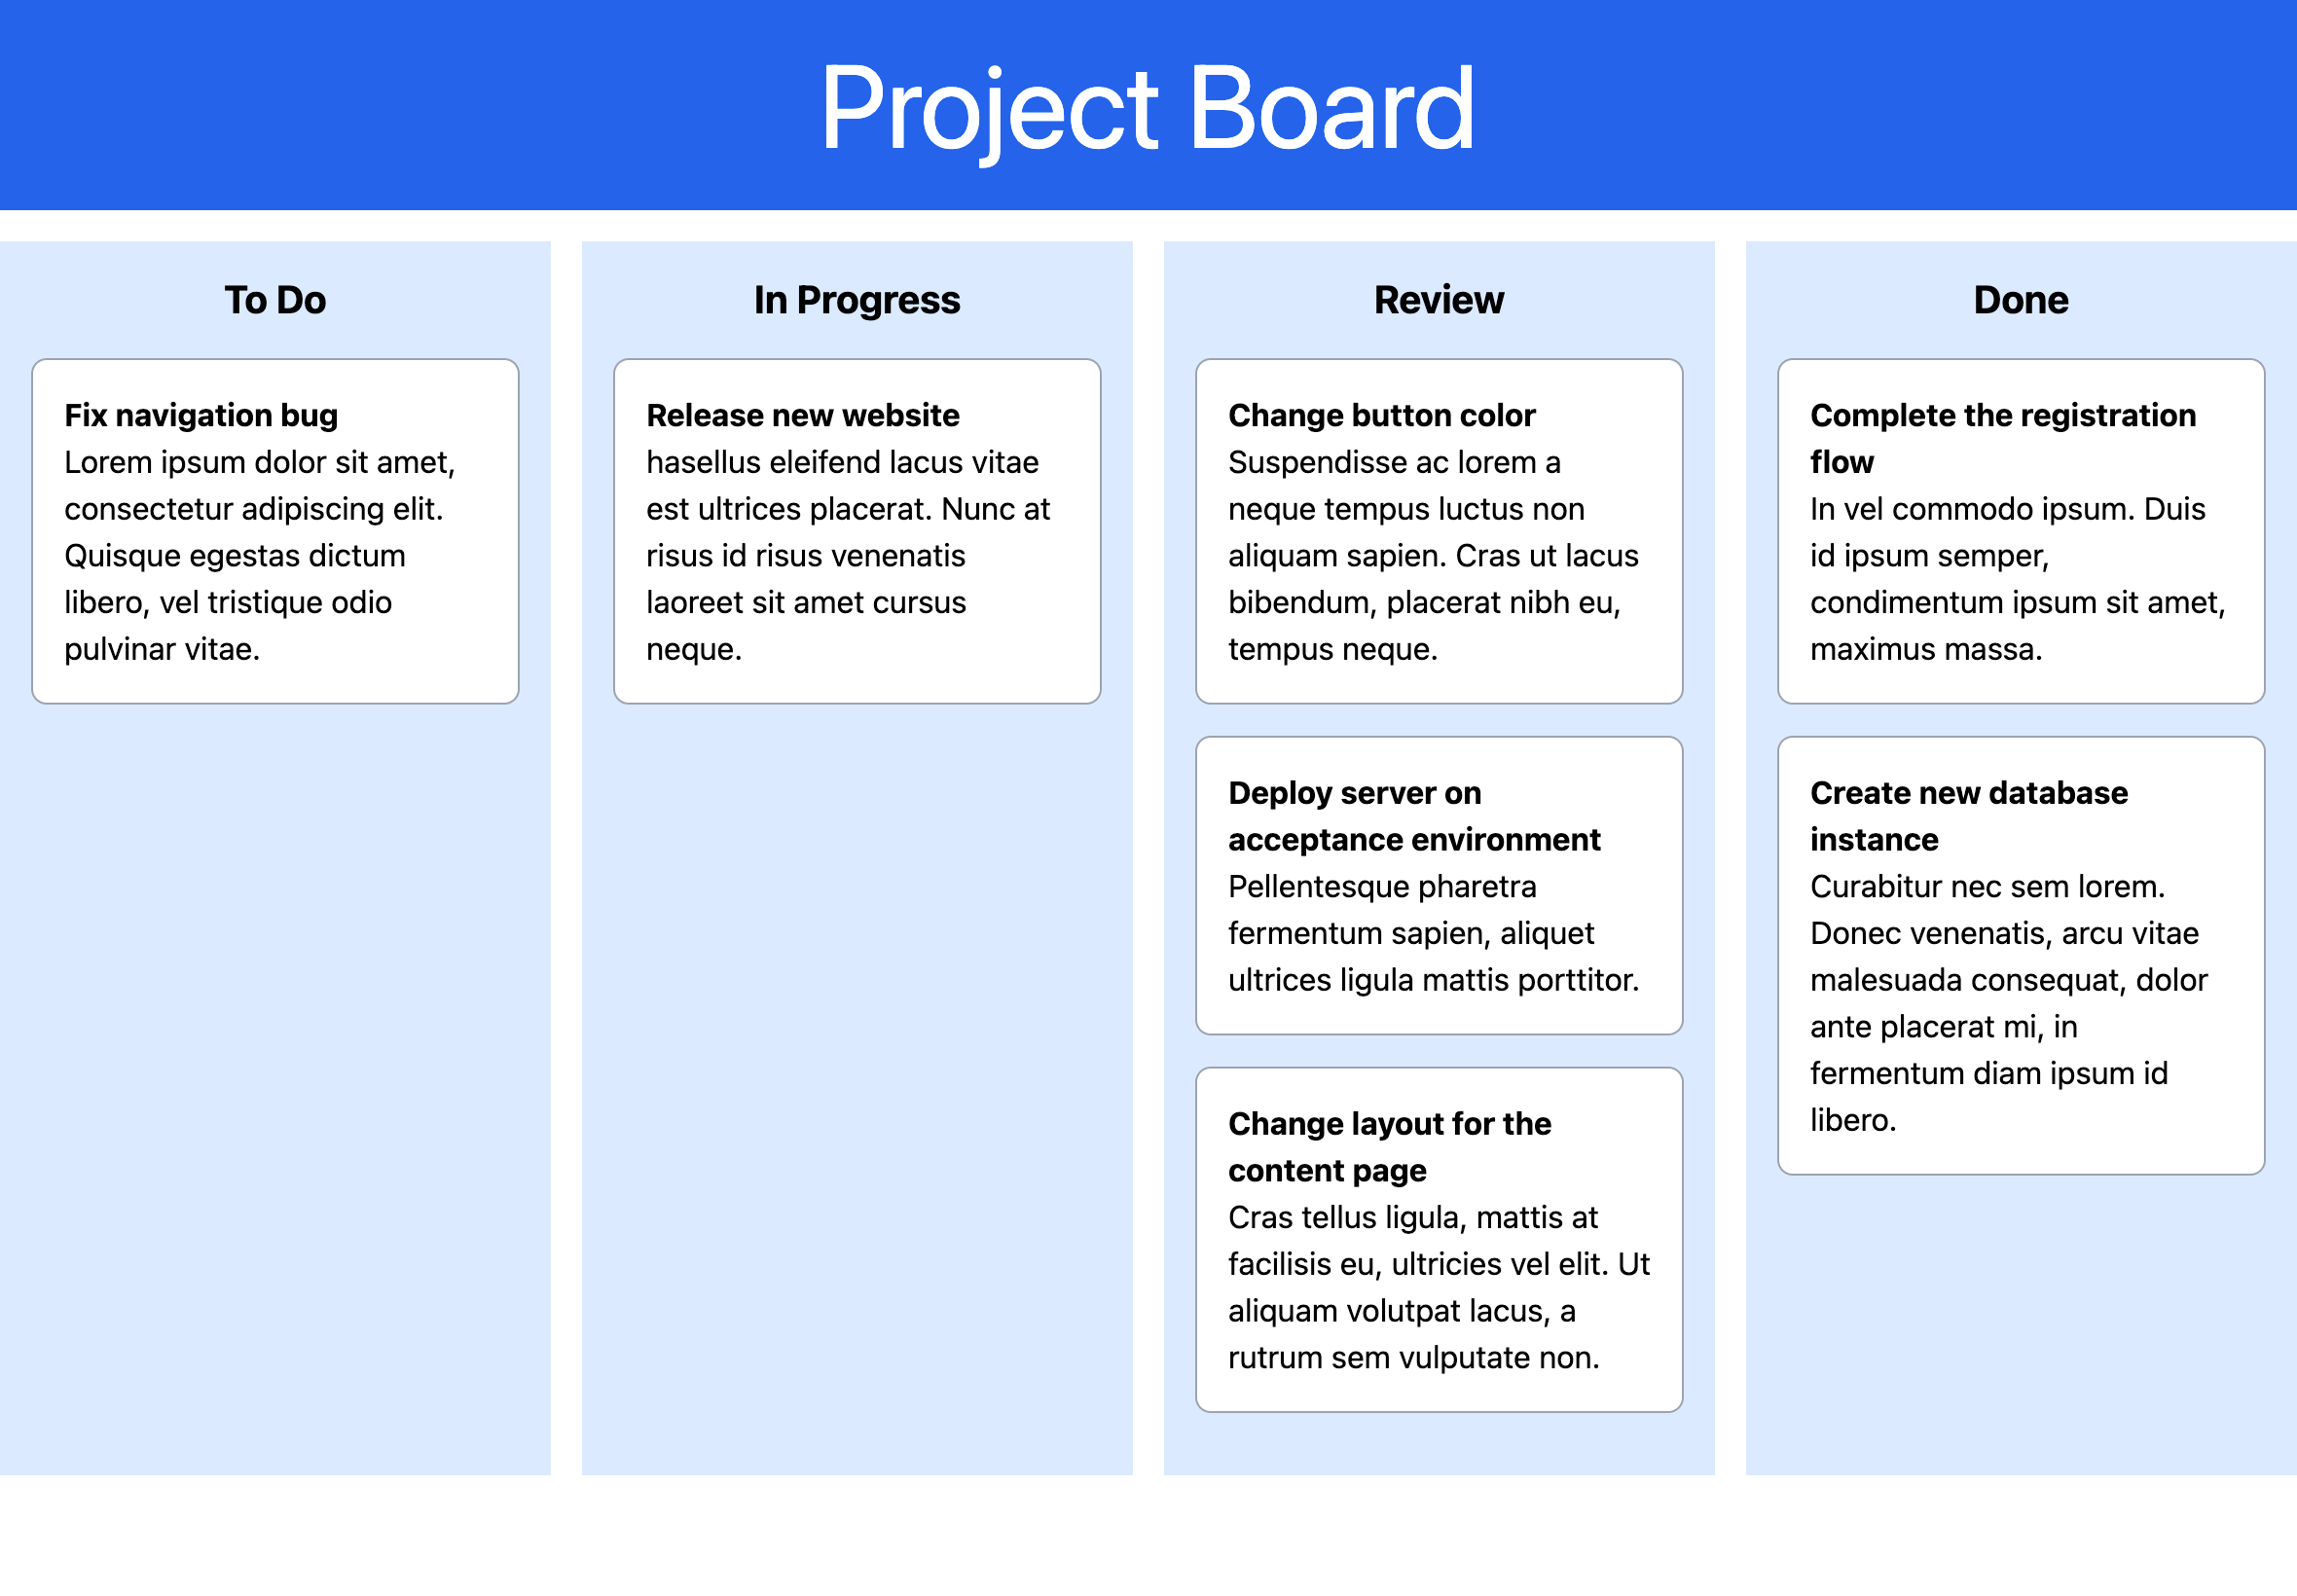 Project Board with Tailwind CSS completed
Learn more
You can find the full source code for this project on GitHub or watch the recording on my YouTube channel. If you found this article useful, let me know on LinkedIn, X or Bluesky. Please share it around the web or subscribe to my YouTube channel for more exciting content on web technologies.